
Introduction To Swift For iOS
Swift is an innovative new programming language for Cocoa and Cocoa Touch. Writing code is interactive and fun, the syntax is concise yet expressive, and apps run lightning-fast. Swift is ready for your next iOS and OS X project — or for addition into your current app — because Swift code works side-by-side with Objective-C.
Apple recently announced a pretty major change to the way iOS apps have been developed in the past, an entirely different programming language called Swift which replaces Objective-C. In my efforts to learn the new language, I’ve decided I will be posting regularly as I step through the learning process, sharing everything I find. This is the first post of many on the topic, and I hope you decide to follow along!
It is highly likely that much of the code examples here of Swift will be changed later. This is partially because my development style is to write now to test an idea, and refactor later, and it is partially because I (like everyone) am completely new to Swift and am starting out fresh. So it is likely as I learn things over time, the course of this tutorial will change. I will update code examples as needed, but not so much that the learning process is not also demonstrated. I think this is also a useful process to see.
So I’m going to start with a pretty basic app and explain how the code works. Ready? Here we go…
The Basics
Swift does away with the standard of declaring variables by starting with their type names, and instead opts to use a Javascript-like ‘var’ keyword to define any variable.
So for instance in Objective-C where you have this:
|
1
|
NSString *myString = @"This is my string."; |
You now have this:
|
1
|
var myString = "This is my string." Meanwhile constants are expressed with the ‘let’ keyword |
|
1
|
let kSomeConstant = 40 |
In this case kSomeConstant is implicitly defined as an integer. If you want to be more specific you can specify which type it is like so:
|
1
|
let kSomeConstant: Int = 40 With both arrays and dictionaries, they are described using brackets [] |
|
1
|
var colorsArray = ["Blue", "Red", "Green", "Yellow"] |
|
1 |
var colorsDictionary = ["PrimaryColor":"Green", "SecondaryColor":"Red"] |
There’s a lot more to go over, but I think these basics are important to get a start going on to the tutorial. So with that, let’s move on to Hello World.
Hello World
First, we’re going to write the simplest app imaginable to get started, Hello World. This segment comes directly from my upcoming book on Swift development, but it’s so important and fundamental to getting started I thought it would be good to release for free here.
Our app will only do one thing: print “Hello World” to the console. You’ll need a developer copy of Xcode in order to follow along, which requires a developer account. If you have one, head on over to http://developer.apple.com and get your copy before we begin.
So now you’ve got your IDE set up. Let’s write hello world out to the console. This example demonstrates the simplest app that can be built, and more importantly shows that you’re environment is set up correctly.
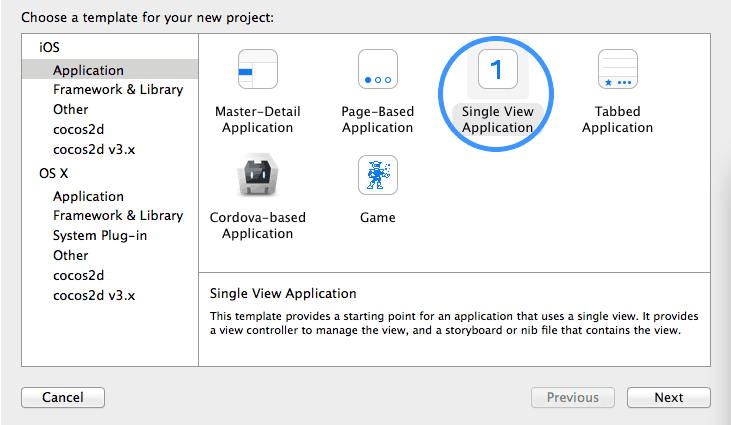
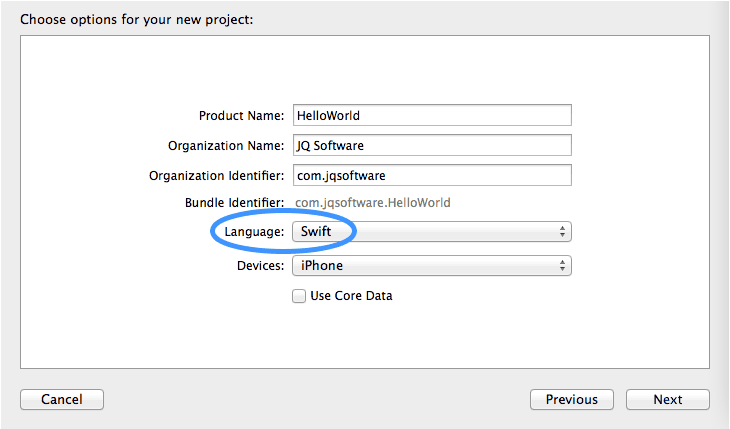
Set up an Xcode project using the single-view application template, and make sure you opt for Swift as the language.
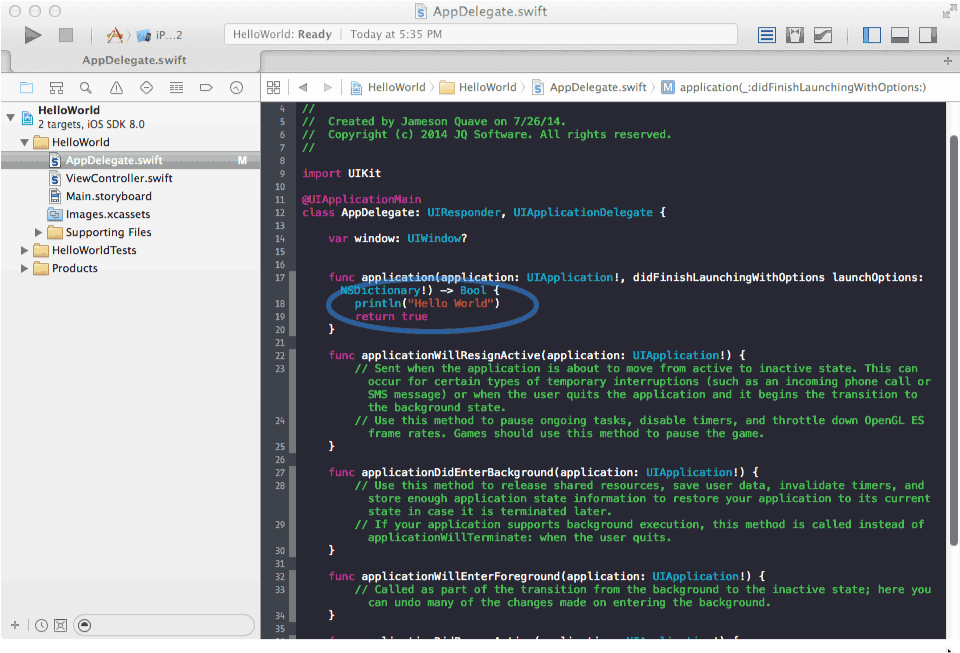
You should now find an AppDelegate.swift file in the project hierarchy. Inside of this file find the line that says:
|
1
|
"// Override point for customization after application launch." |
Replace this line with our amazing hello world code:
1
println("Hello World")
Now press run and you should see a blank app boot up, and the words “Hello World” print to the console.
**Note that this will not show up in the iPhone simulator. Look at the bottom of your Xcode window and you’ll see a console that says ‘Hello World!’.
Congratulations! You just wrote your first app in Swift!